Tracking numbers play a crucial role in managing your shipments effectively. In ParcelWILL, you can manually add tracking numbers to your orders for better tracking and customer satisfaction.
Here's a step-by-step guide:
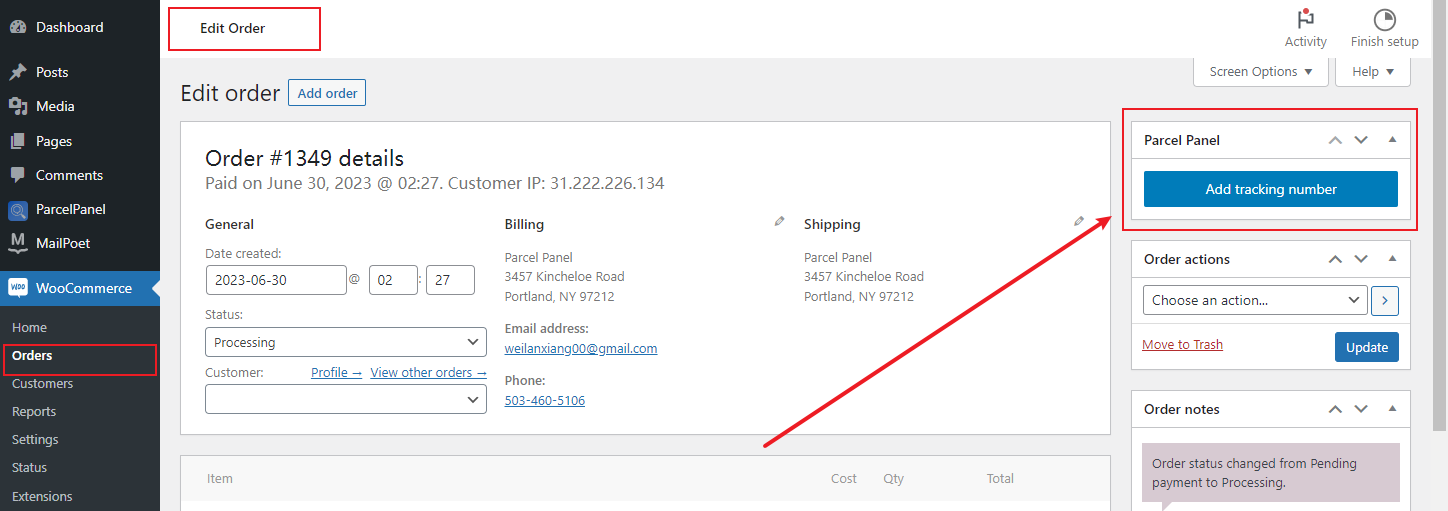
Step 1: Accessing the ParcelWILL section
Go to your WooCommerce admin's Orders section → Locate the specific order for which you want to add a tracking number → Click the order to open the Edit order page → Find the "ParcelWILL" section.

Step 2: Adding tracking numbers for items
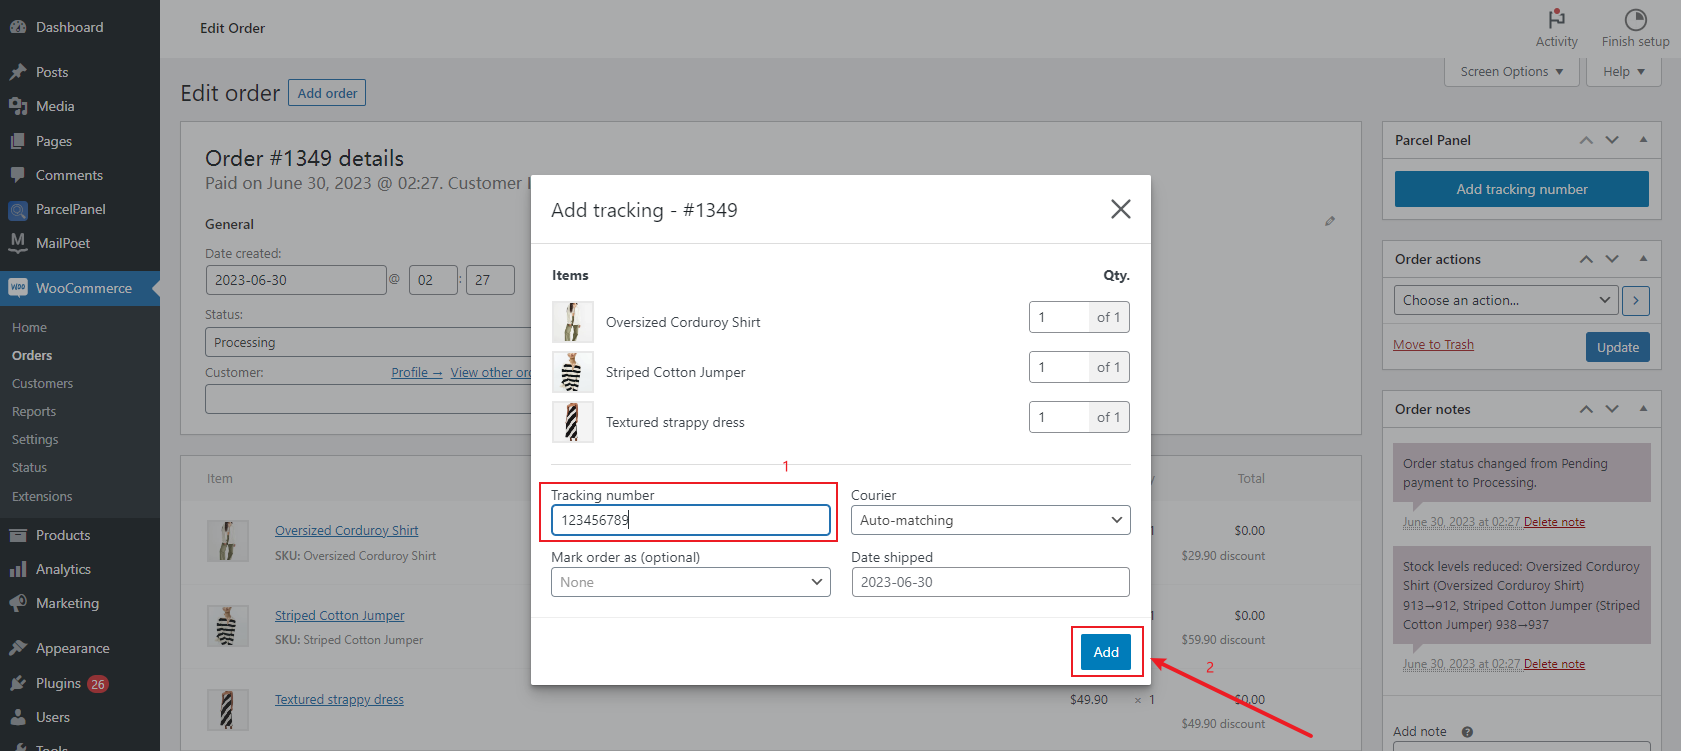
If you want all of your items fulfilled on one package, follow these steps:
Click "Add tracking number" button → Enter the tracking number → Click on the "Add" button to save the tracking number
If you have multiple items in the order and need to differentiate them for shipping, follow these steps:
Click "Add tracking number" button → Select the corresponding quantity of the items you want to ship → Enter the tracking number for that items → Click on the "Add" button to save the tracking number
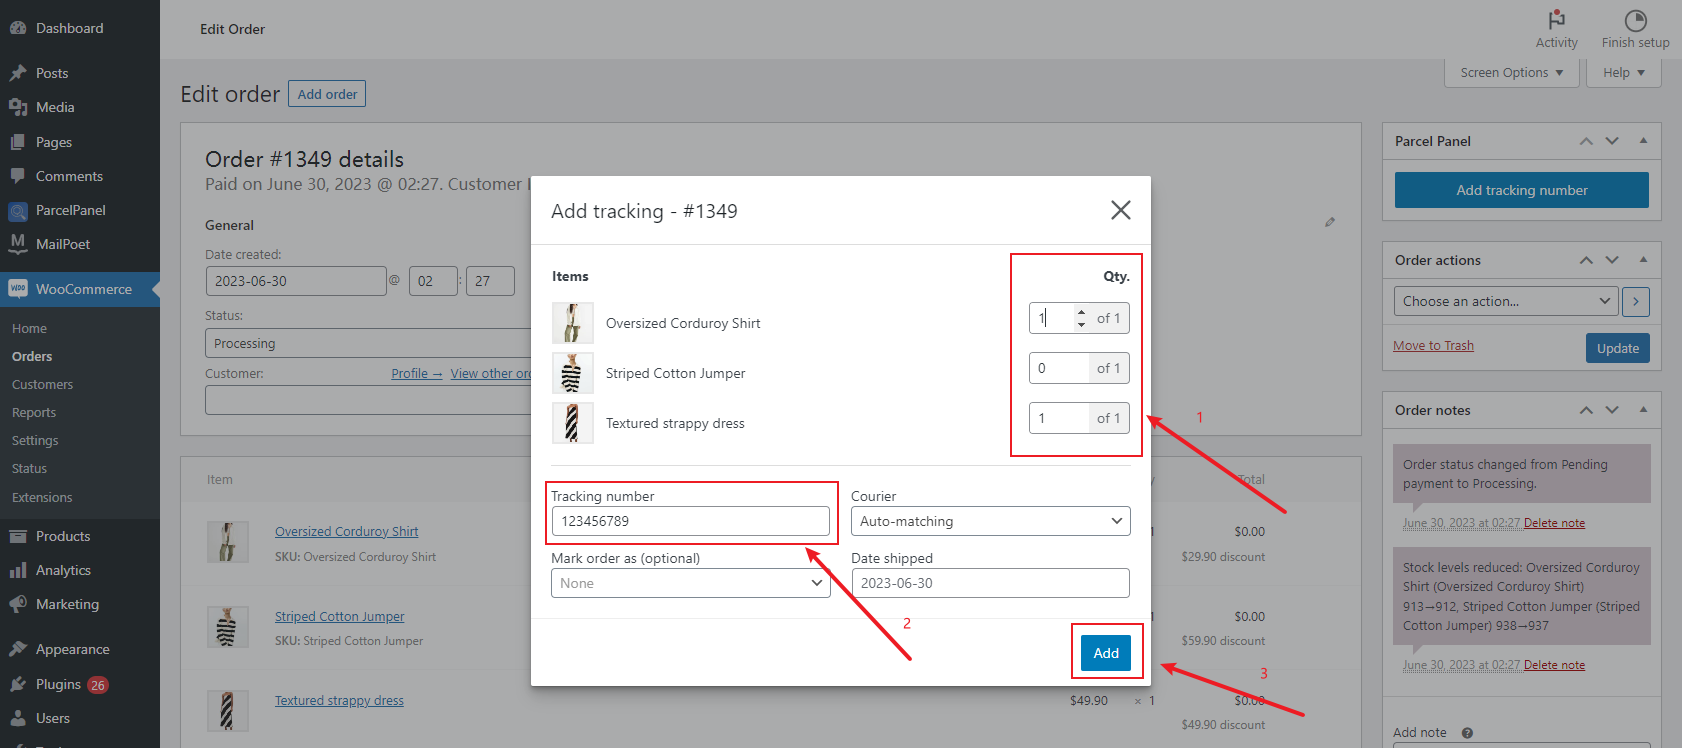
Repeat the previous step for each product in your order until all the products have been fulfillmented and have their respective tracking numbers assigned.
▶ Note:
• Please note that the tracking numbers are not generated by ParcelWILL itself. We understand that merchants use various shipping methods, including third-party platforms, dropshipping apps, or self-fulfillment, which provide tracking numbers.
• To obtain the tracking number for your order, we recommend reaching out directly to your shipping provider for assistance. They will be able to provide you with the accurate tracking numbers.
Additional Optional Fields in ParcelWILL
In addition to adding tracking numbers, ParcelWILL offers some optional fields that you can fill out to further enhance your shipping process. Here's an overview of these fields:
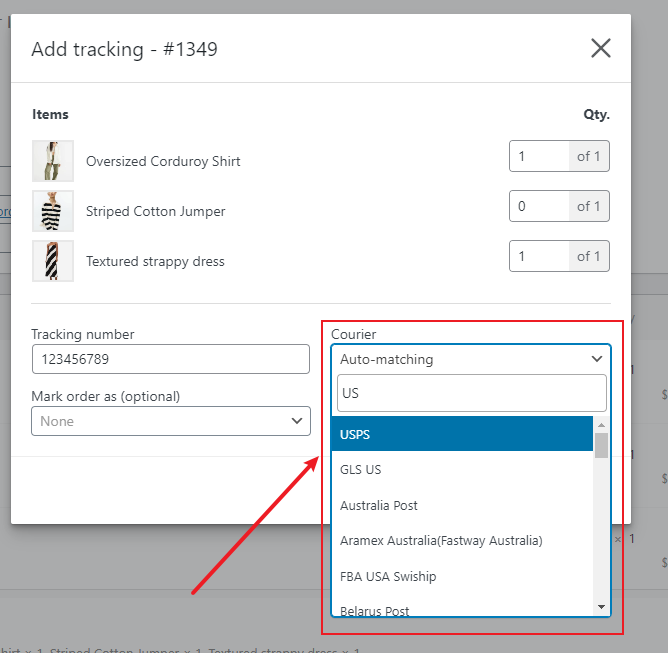
1. Courier (optional):
• If you select the appropriate carrier from the "Courier" field, ParcelWILL will directly use that specific carrier for your shipment.
• We recommend filling in this field when you are certain about the carrier you're using. However, if you're unsure, you can leave it blank. Our system will automatically match the carrier based on predefined rules.
2. Mark order as (optional):
When adding a tracking number, you have the option to change the order status simultaneously.
• ParcelWILL supports three options for marking the order:
▫ None: Leave blank to not change order status
▫ Partially Shipped: This option can be selected if you're only shipping a portion of the order while keeping the remaining items for future shipments.
▫ Completed: Selecting this option indicates that the entire order has been shipped and fulfilled.
▶ Note: If you have other plugins or systems configured to perform specific actions based on the WooCommerce order status, they will be triggered accordingly. For example, if you have set up an email notification to be sent to customers when an order is marked as Completed, selecting this option in ParcelWILL will trigger the email notification to be sent.


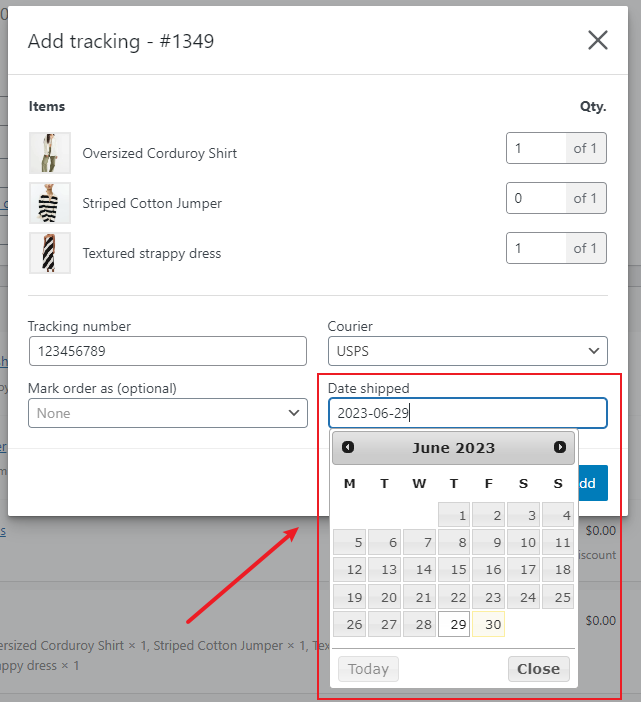
3. Date shipped:
• This field is automatically populated with the current date and time when you add the tracking number. Of course, if your shipment actually fulfillment yesterday, you are also free to choose the corresponding time.
By utilizing these optional fields, you can customize the shipping process according to your requirements and streamline order management in ParcelWILL.